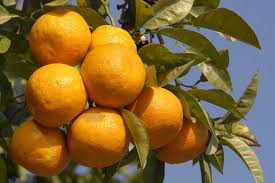
I have a friend who makes this amazing Seville orange marmalade every so often. Her mother-in-law brings her Seville oranges from Northern California. Originally these oranges were from Seville, Spain. You, know like the where that Barber is from. These oranges are so bitter, they taste almost like a lemon, but without that lemony brightness. So, what to do with bitter, Seville oranges? Add 5 lbs of sugar, and make jam! And lucky me, my friend offered to show me how it's done.
I know this is no news flash for most of you, but I was not very domesticated as a kid, and have never done any canning or jam making before. Brand new territory for me, this domestic goddess stuff.
This is my friends mother-in-law, Bernice's recipe:
8-9 Seville oranges
1 lemon
7 cups of water
5 lbs. sugar
1/8 tsp baking soda
The day before, my friend squeezed out the juice and seeds of 8 Seville oranges. Separating the seeds and saving the juice and the rinds. She then covered the seeds with 1 cup of water, then cut the rinds thinly, added remaining 6 cups of water to skins and soaked overnight.
Sunday morning, we began our project.
Add the juice and baking soda to the skins, and simmer gently, uncovered for 30 - 45 minutes to soften. Skins must be soft.
At the same time, simmer seeds for 15 minutes covered.
Strain juice from seeds, pushing with a spoon to get as much through the strainer as possible, then add to rind mixture.

Using a wooden spoon, slowly add the sugar, stirring constantly. At this point, you have to keep stirring or it will burn.
Turn down heat and simmer gently for 1 hour, uncovered, until mixture thickens when tested. Start testing at 40 minutes. We took chilled plates, and placed just a bit on the plates, watching closely for a sort of wrinkling to happen. Ours took more than an hour to thicken, probably about an hour and 15 minutes.
Meanwhile, boil lids of 14 -16 jars. We sterilized the jars first in the dishwasher.
Then start filling the jars with the thickened mixture.

The golden-honey color is amazing!

Then place covered jars in a boiling water bath for 20 minutes.


Take out of the water bath, and voila, done! Lids clicked into place, and marmalade will be enjoyed by all!
OH! Care! I am VERY impressed. But how does it taste? I needed to see some lsathered on some good whole grain bread AND a full report. Don't tell me you went to all that trouble and didn't even taste it??!!??
ReplyDeleteOk, you got me. I didn't even taste it. But, it really should set up for a while, and it's hard to taste right away as it's pretty darn hot, too. I've had my friend's marmalade before, and it's delish! Those Seville oranges keep it from getting too sweet. Whole grain bread, a swipe of cream cheese or creme fraishe, topped with a dollop of marmalade, mm-mm! I'll break into one this weekend, for sure.
ReplyDeleteThat looks like a lot of work, but worth it I bet in the long run! Years ago, I made strawberry jam- I think it was a Better Homes & Gardens recipe. No jar boiling though, from what I remember. You have to taste it and let us know! Yum!
ReplyDeletegreat post!!! so DIY!! i'm inspired. now i just need to find a seville tree...
ReplyDeleteooh, how incredibly jealous I am right now...I mean, soo happy for you!!
ReplyDelete